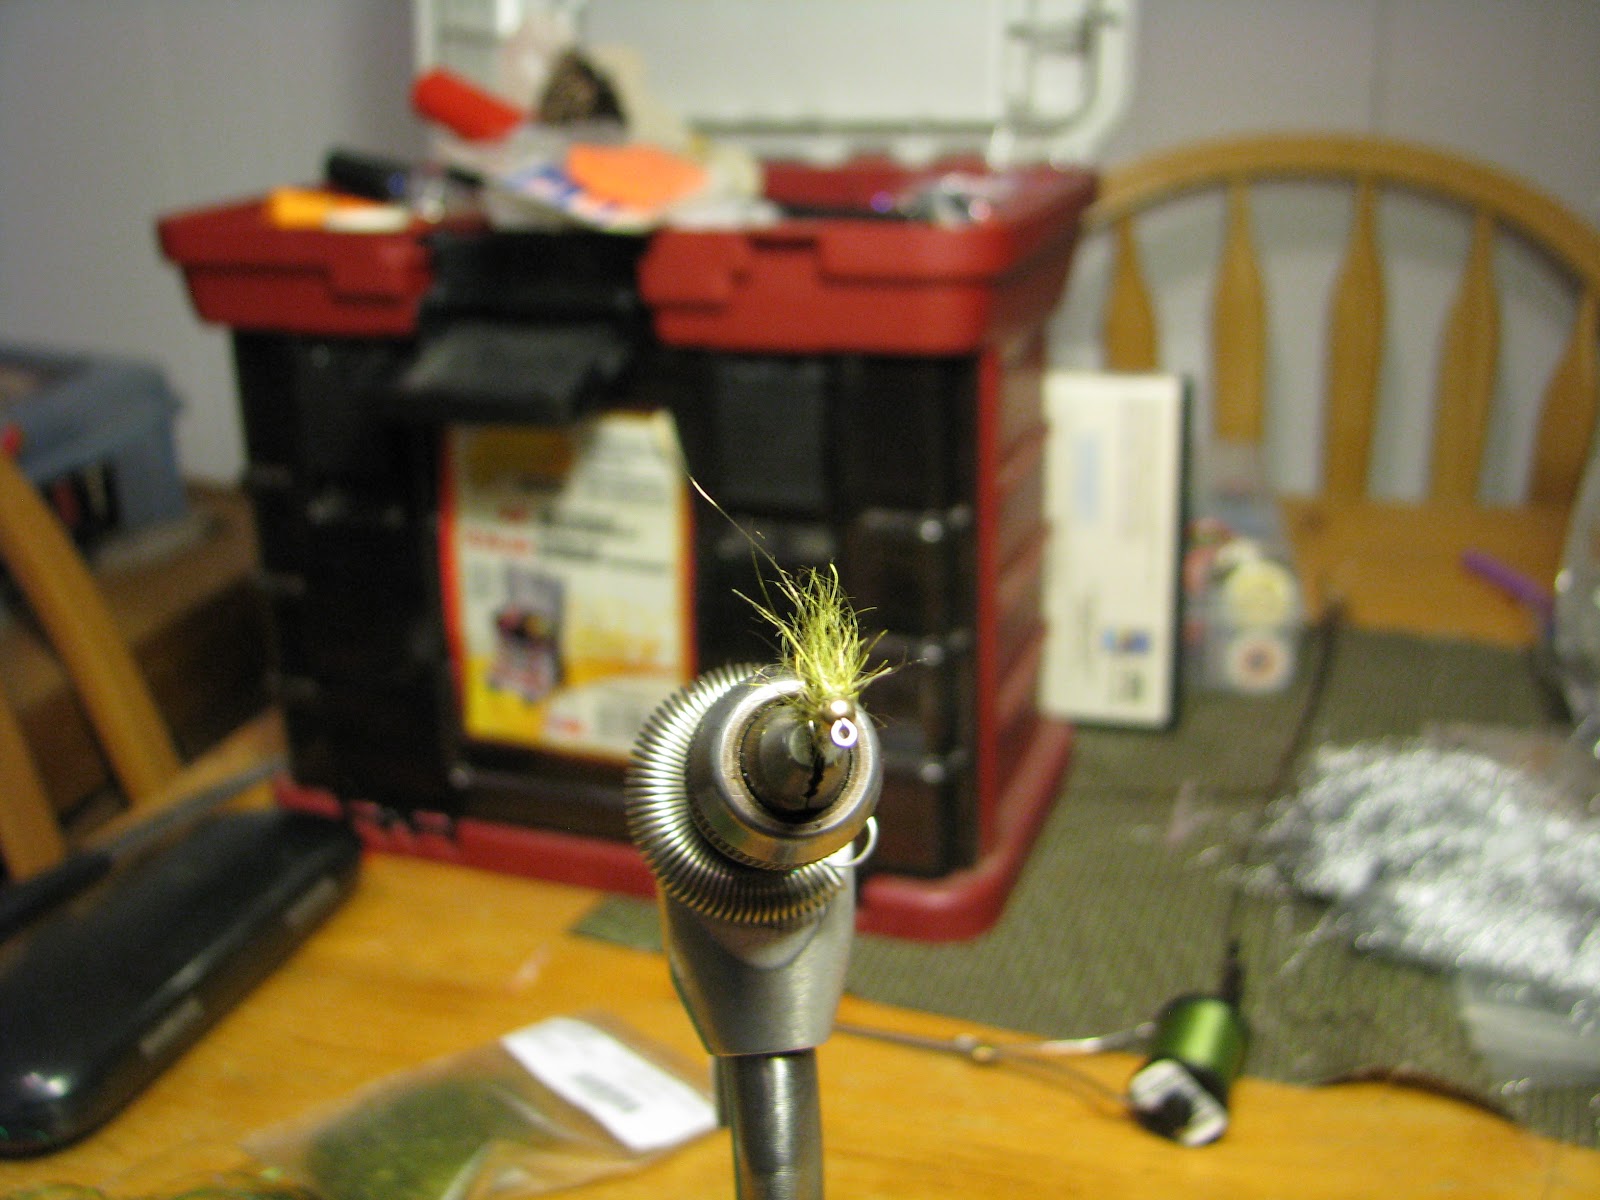
Feather Duster nymph

This pattern was a god send once(and ever since) at Peterhope Lake during a huge mayfly hatch (see story here) we happened upon many years ago. Since then it has been a staple in my fly box for BC interior mayflies. I thought since the still water season is just around the corner I'd share this with you now so you can get a few into the boxes in time for the early hatches. Also being weighted it is a good option for early season cutthroat when they get finicky after gorging on fry early morning and turn to nymphs for 'dessert' in the afternoon.
Here is what you will need:

Hook: #10 regular shank
Thread: Black 8/0
Weight: 8-10 turns of .020 lead
Tail/legs/halfback: Mallard Flank
Rib: Fine Gold Wire
Body: Olive, Brown or natural Ostrich
Instructions:
Debarb hook in vice

Add turns of lead just forward of mid shank and anchor/cover with thread


Cover the rest of the hook with thread, and wind back to the rear, and tie in a few fibers of mallard flank for the tail as well as gold wire for the ribbing. The tail should be approximately as long as the flat of the hook shank.

One of the 'things' about this pattern is everything gets tied on before you do any wrapping so it's prudent to make good use of the hook shank to allow for proper body proportions on the finished product.
Now select 3 ostrich herls and tie them in by the tips on top of the shank and leave them extended out the back of the fly (possibly using a keeper to hold them out of the way)

Next, move the thread forward to about the halfway point and tie in the shell back/legs. The tips of the mallard flank will be the legs when swept back, and the butts of the same will be the shell back so choose appropriate size of feather for this application.


Tie them in with the tips extending forward over the hook eye while the butts will be used to create the shell back, bend them upward to facilitate wrapping process again using the hook shank as a gauge for length of the mallard flank tips to extend past the head area. (not including the hook eye)

Now you are set to begin wrapping up the ingredients to complete the fly. There is one key trick to making this 'easy' and that is getting around the shell back of the mallard flank with both the ostrich plumes as well as the wire rib. If you find the shell back portion is in the way (it wasn't 'this time' when I tied it up but it well can be a nuisance while tying) since the thread is at the head section one can hold it out of the way of the rear tying area with a couple of wraps over it while wrapping and then undo them to allow the fibers to pop back up and continue to the head section.
Wrap the herl forward in close touching wraps making sure to create thin abdomen with a gradual taper towards the thorax. The lead placement really helps here and should be thought about when doing the placement. Tie off just back of the hook eye to leave room for a head.

Next COUNTER wrap forward the gold wire to give segmentation, flash as well as strength to the delicate ostrich herls.

Now fold down the shell back and secure and trim. Again make sure to have a decent head area when doing so.

Now divide the 'legs' and sweep half at a time back along the opposite side of the fly to create a good profile and tie each down one at a time.


Whip finish, glue, and there you have it, an awesome olive mayfly pattern that really breathes in the water. I like fishing them up shallow when a migration is on right IN the reeds with a slime line or Ghost tip.
Have fun!!!
Olive Mini Leech
 I'm sure most of you are thinking "Sure, a leech thanks for the tip". Read on my fellow fly fishers and see just why this simple leech can and is at times the best thing in your box to catch cutthroat. |
This time of year it's all about the fry migration and while they can be the be all end all, other means of capitalising on the hatch can be realised besides trying to intrinsically match the various sizes and stages of fry that can and are keyed upon during this bountiful time in cutthroat fishing. What can be a frustrating (and rewarding) often times 'matching' the fry can and is filled with a good dollup of consternation as with matching any hatch can be. What this pattern affords, is a way to aid you in 'matching the hatch' without even seeing what size, colour, stage or even species of fry the fish are targeting. This is a fairly small pattern (12 short shank) and really nondescript. The colouring seems to be perfect for both matching the stickleback that haunt most back waters and sloughs (they tend to be an olivy gold colour) AND it seems to be a really decent prey item of the fry themselves. Yep, that can be a great thing especially when fishing large areas with fish that are on the move foraging rather than concentrating in a single spot - moving in and out as the forage does. Casting this little devil long and bringing it back in fairly quick short strips can have it surrounded by fry attacking, pulling, and nearly falling over each other trying to 'kill' it. It being slightly bigger than what they could easily fit in their little gullets rarely if ever results in an impaled minnow though it can happen upon occasion. Ok, in case you aren't following, the fry after this fly will not go unnoticed by fish foraging for the minnows that are chasing down your little leech should you decide to tie it on and try it out. What this fly is doing is gathering just what the cutthroat is looking for and luring them to the vicinity of your fly. The mental wheels should be turning now for you, connecting the dots. It will go kind of like cast, allow to sink for a time depending upon how deep you are fishing, and then a fairly lively retrieve is begun though not much line taken in per strip (similar to a shrimp retrieve) which will result often in many small pulls, pecks, and whacks on the end of the line as fry gather and try to eat the erratically moving lure. If all goes right after 'some time' the line will go dead (no more little pulls and hits) and if the retrieve is continued and all goes right (the stars align) shortly there will be a SmAsH hit of a fish (hopefully a cutthroat or bull trout maybe) that destroys the fly. Here is what happens. The fry following the fly draw in the fish, the fish scare off the fry and all that's left is your fly limping along all alone and vulnerable. The colour combined with profile go a long way to making it a perfect forage item, I'll explain a little more at the end of the recipe as it's more apparent once the fly is finished. Here is what you are going to need:  Hook: Hanak #12 H 200 BL or equivilent Thread: Olive 8/0 Bead: Gold 3/32nd Tail/body: Dark Olive Arizona Semi-seal If your hook isn't debarbed then do so and place it in the vice. With beads and my fat fingers I find it easier to use the vice to hold the hook while threading the bead on:  Then just pull the hook out by the bend and with a flip of the wrist the bead goes to the hook eye, and replace in the vise and clamp down smartly. I just use a little pressure rather than seating the hook in the vise for putting on the bead, makes things go easier. Cover the hook shank with thread and tie on a tail the lenth of the hook shank left behind the bead:  Next form a small dubbing noodle, fairly sparse but fairly tight: 
Wind it forward forming a uniform body that is fairly thin, and end it with a slightly loser ball of semi seal at the front just behind and whip finish:
 Now the thing is to pluck this pattern out ONLY top and bottom and you will have the other reason I believe this pattern functions so well - even when there isn't a bunch of fry following it around:  
As I turn the vice, the profile changes:
  Tie some up, try some out and I bet you gain some new respect for this little pattern that you might have initially thought a pretty good way of cheaping out on the Fly of the Month. Truth be known it's one of my best options in the box.  Have fun!! |
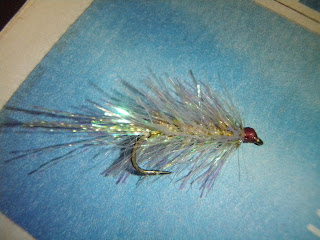
Gold and Silver

Well actually it's Pearl and gold but when I tied it I kept calling it the gold and silver so there it is.
As time goes by I will be putting together a better studio to take fly pics, but for now you guys can put up with my shit in the background and artsy settings like a blue square on the front page of the Province for colour background effect.
As most successful patterns are this one is a mix of a few ideas including pattern as well as materials as in utilizing new takes on fly construction in relation to what trout are 'likely' to see and interperet as food in this case the the accent falls on the UV spectrum.

The original idea came from Todd Oishi when he gave me a pattern that he was having great success with that he called the TNT because it was dy-no-mite and it was. We did really well with it for both cutthroat and coho. His was basically the same pattern but achieved in a different manner and as we'll see one that can be more adaptable depending upon the target species, mood of the tier, or the need for specific apllication. With this recipie literally the sky is the limit because this is just a flashy synthetic version of a woolly bugger. Just another retake on what is probably the best fly ever invented.
Todd's version was after tying on a tail of flashabou, using the UV pearl palmer chennille, lashing it to the hook, doubling the material forming it into a loop and tying the end back to the shank. The resulting loop of palmer chennille was gripped with hackle pliers and spun, making a giant 'super' chennille which was wound forward stroking it back all the while up to and tied of behind a bead with olive thread.
 |
| Todd's TNT fly What I discovered was I was going through a lot of that material per fly and decided to see if I could make a package go further by using an underbody and palmering it. The first few I tried through construction problems ended up 'helicoptoring' in the water - twisting up the leader because of the stiff nature of the material and the results of spiraling it up the pattern - sorta became like a drill bit in the current. Below I have ironed out all the problems with applying materials and with this recipie you can modify to your hearts desire. The gold and silver colour combination for myself has been the best across the board producer for the most species and times of year. From salt to slough, stream to lake this concoction of materials catches pretty much everything that swims on the West Coast and with practice can be spun out by the dozen in very little time. All synthetics translates into durable as hell. I tie them with blue and chartreus for coho, red for sloughs, and lately yellow and orange has been creeping in there. Like I said limitless options when you start looking through your dubbing drawer after you are finished with your chennille. I also tie them with 1/8th inch tungsten gold beads as well, especially if I intended to fish faster pocket water or deep slots in rivers.  Ok, let's get started. Here's what you are going to need:  Hook: #10 Mustad 2XH/3XL Thread: Red 8/0 Tail: 10 or so fibers of crystal flashabou Palmer: Dragonfly small pearl grey palmer chennille Underbody: Medium gold chennille Head: Red thread (Or gold bead with a red thread collar behind) Get the hook debarbed and covered with a base of thread to tie on. Always cover the shank well it really aids in fly durability. Tie in the flashabou and trim to the length of the hook shank. Any shorter and it will be lost in the palmering material: 
Next prepare the end of the palmer chennille to be tied in by trimming off about 1/2 an inch of the fibers from the string:

Do the same to the gold chennille as well but rather than trim strip it off the string, it makes for tying in at the rear slimmer and pretty much nullifies the bump that can occur when you tie in multiple materials at a single point:
 Tie them both in leaving a bit of extra slack at the tie in point. The idea is when you begin to wrap the materials you get them going how you like them before they get caught up with each other to avoid that helicoptering I was talking about earlier. Wind forward the chennille counter clockwise and tie off leaving room for a head and prepare to do the palmer: 
Now in the clockwise direction begin the palmer forward with the UV chennille, in fairly wide wraps. I usually get 4 or 5 per pattern and sometimes six. The idea during this step is to start out right. When the first wrap is made it is critical to have the fibers pointing tailward on the fly (the string as the leading right hand edge) and to avoid twisting during the entire palmering application. I use hackle pliers and the fingers of my left hand to keep the material oriented correctly throughout the process passing the material from hand to hand as it circumvents the hook in the vice. It may sound complicated but after a try or 2 the reasoning becomes apparent and with it the mechanics become second nature. Basically by running the chennille one way up the shank and the palmer the other, I am keeping clear of the palmer chennille string from getting into bed with the wraps of the gold chennille , allowing a laid back result rather than 'spiked(y)'. Finish the palmer with 2 complete wraps at the head one over the other - this is the second step that eliminates the spinning of the pattern in the current it gives good balnce. If you have a beaded pattern just do the wraps at the bead and tie off and clip, glue, whip finish, and glue again.
 Like I said this fly has really been a great success story and like many flies it's just a another dressing of the same old fly. Try some in any colour of the rainbow and mixtures there of. Change the tail colour, or use braid for the body. Have fun. |
The Crocodile

I came up with this fly at least 5 years ago after somebody schooled me with the spoon of the very same name for the umpteenth time. Proud of how it looked and moved in the water, I fished it hard the first few months after it's conception and had no results. I mean NOTHING. I tried it in sloughs, the ocean, rivers, and even lakes but for the life of me I couldn't get bit on it. After the initial freverent trial period, it just sat in the box next to the other one I tied, possibly both talking about how good they looked vs how well they worked.
Fast forward 3 or 4 years and I found myself hunting for purported 'fresh' coho that were supposedly 'in' at Kanaka Creek. Upon arrival we saw that the tide had really moved in and had started it's way back out. The water was VERY coloured and as such visiblity was a problem. (in my mind anyways) Fish were moving here and there (they turned out to be cutthroat) but only a single fish fell to the flash pattern (to be included in this blog as time goes by) I had opted for even though I had hit the rings of several movers.
Opening the fly box seeking alternatives, I saw the silver/orange flash of the 'Croc, and with a small inward sigh and little hope, I tied it on.
A fished moved and I cast, having just clipped the tippet tag, of course, it landed bad - like 5' away from the rings.
*POW*
A nice cutthroat hit the fly and stayed stuck. "Flukey" I'm thinking, bring that fish to the net, release it. While I'm doing so another fish moves a little upstream of where I'm landing this one. The fish I landed took right off, so since the flow of the tide was slow yet, I presented the fly upstream to the fading rise rings having no idea if I was even in the game and *doink* another cutthroat leapt to life at the end of the line.
I caught 7 more fish there with the same fly and filed it for future reference.
Coho season came along and since the slide in Harrison lake, the lower river itself has become increasingly coloured. On a hunch I started fishing the Crocodile with what can only be described as astounding success. Not only did it simply slay the cutthroat where other patterns failed, it totally annialated the coho as well.

Coho jack fooled by the 'Croc


This fly has caught me more cutthroat than I can count. These days it's first fly on in the morning on coloured water and the last fly tried.
Recipie:
Hook: Mustad Big Game 2XH/STD
Bead: Silver coated brass bead 7/23
Thread: Orange 6/0
Tail: Orange marabou
Body: Orange marabou dubbed onto thread (remainder from tail plume)
Collar/skirt: Large UV polar chenille - 3 turns
Head: Prominent band of orange behind the bead
Materials required

Tie in marbou tail about the center of the feather with a few wraps and trim the excess. Next pinch off the tips of the tail so it's about the same length as the hook shank. Secure the rest of the marabou and wind back.

Using the remainder of the feather both tips and butts, dub onto thread

And wind forward making a uniform body taking care to anchor the bead somewhat. Next tie in the chenille so that the fibers point toward the rear of the pattern, this helps managing the material for the end product.

3 wraps only taking care to manage the fibres as best you can rearward, and tie off. Trim excess chenille rope with care.

Sweep all the fibers back with your left hand and form an orange collar with thread, glue, whip finish, and glue again.

That's not a type-o lately I have taken to adding glue to the thread before the whip finish as well as gluing afterwards. Unbelievable difference in pattern durability.
Fish this fly in coloured water of all kinds, on the swing, but really excells being stripped both fast and slow. One thing it's prudent to mention is at times this pattern can foul so if it's working and then stops or not working at all, try seeing how tangled up the skirt/tail is before switching it up.
Have fun.
No comments:
Post a Comment